Pinterest is a very dangerous site for me. I don't know what I did before it though... I probably thought I had original ideas and my crafts were not nearly as cute as they could have been. My best friend Emilee is just about ready to welcome a new little boy into their family. So of course that meant it was off to Pinterest to find something cute for her new addition. I made these three onsies with the ideas I got there.
I apologize for the poor quality of pictures but you get the idea.
Showing posts with label Crafts. Show all posts
Tuesday, September 17, 2013
Work on the Nusery
I am a pretty crafty lass sometimes... when I say that I mean I ENJOY doing crafts... with the help of Pinterest of course. Since we don't know when we are going to welcome a new little one into our family we are always preparing... we might only get a few days notice. Plus it is SUPER fun to decorate and get things ready. Of course everything has to be gender neutral but I haven't had to sacrifice any cuteness because of it. These are some of the things that we have completed so far.
I am a little obsessed with owls and so that is the theme, if you will, for the nursery. I made this valence with the cutest owl fabric ever.
This past Christmas Mike got me a Silhouette. This is why I wanted one so badly... I have done lots of other things with it, don't worry. I'm not that silly that we would spend that much money on something for one project... it was just a really good excuse for getting one.
These last two aren't things that I made but that I am really excited about.
I am a little obsessed with owls and so that is the theme, if you will, for the nursery. I made this valence with the cutest owl fabric ever.
Before and after of a chair that I reupholstered. It isn't perfect for sure, but it is a large improvement.
This past Christmas Mike got me a Silhouette. This is why I wanted one so badly... I have done lots of other things with it, don't worry. I'm not that silly that we would spend that much money on something for one project... it was just a really good excuse for getting one.
These last two aren't things that I made but that I am really excited about.
We bought this quilt at a silent auction for $50. Some of you may be saying "what a rip off!" But for those of you who know about quilting know that the fabric alone was probably $50 if not more. Then the time to put it all together and to have someone quilt it. I LOVE the way it looks and it is something I am so excited to add to the nursery.
I can't remeber when I heard about these books but I have been wanting them for a long time. Mike and I were killing some time at Deseret Book (very dangerous for us) and I came across these lovelies. Of course they had to be mine. I am so excited to read them to our children...they will have no choice but to be some of the most awesome kids alive after reading these. ;)
Friday, October 19, 2012
October Craft-mania
At the beginning of the month I got to go over to one of my best friends house and do crafts with another one of my best friends. We went out to dinner before and then went back to Katie's house to get our craft on. We may have planned a lot to do and not all of it got done that night but it was a BLAST! This is the one activity that did get completed that night.
This is little Tom Turkey
Isn't that adorable. All he is made from is:
2x 4 cut to 3 1/2 inches
5 gallon paint stirrer
7 Popsicle sticks cut in half
scrapbook paper
for the complete break down on how to complete this adorable turkey go here.
We also started the pumpkins and the mummy that night. We spray painted the pumpkin pieces and the mummy pieces. I finished of the pumpkins later on by sanding them down and tying the ribbon. Then I finished the mummy by tying the linen and adding the eyes.
I got this idea from Brown Paper Packages. All you need is 4 pieces of 2x4 cut to 7 inches.
My friend Emilee cut these pieces for us so I am not sure the measurements. I do know that she found this cute guy on Pinterest.
Later in the month we had our Super Saturday at my church. Super Saturday is a day when all of the women get together and make crafts. There are certain crafts that you can purchase or even get for free. I made these pumpkins which were free because I provided an old book and one of the husbands brought his jigsaw and cut the books down.
This was a very easy craft but quite time consuming. All you do is:
trace the shape of your pumpkin on the cover of the book
cut the book with a jigsaw to match the shape
tear the covers and binding off the book
steep tea bags in water and dab the edges of the book with the tea bag to get a dark color
blow dry the edges of the book after you soak them with the tea
crumple each individual page (yes one page at a time)
get a stick and glue it to the center of the binding
glue around the stick and fold the book around the stick
tie decorative ribbon to the stick
This last picture is not something that I made...I wish I were that awesome! I go to the Farmer's Market at Pioneer Park every year and there is this one booth that I always go to and end up spending a lot of money at (not because it is expensive but because I LOVE everything there and I end up buying a ton of stuff). They pride themselves on not just using a laser cutter to complete their projects but doing a lot of it by hand. He also sells all of his stuff for cheaper than the booths that sell the laser cut items. There are certain parts that he does use his cutter for but you can tell the amount of craftsmanship that went into this piece alone.
If you ask my husband he might agree with this sign;)
Thursday, September 6, 2012
Pinterest Strikes Again!
I absolutely LOVE Pinterest! It is my crafting and cooking dream. I find myself pinning everything cutesy and delicious looking. I am one of those people who pin a ton of stuff and hardly do any of it. Not because I don't want to but mostly because I don't have time.
The week before school started this year I decided I needed a cute wreath for August-September and a Halloween wreath. So I looked at my pins and found two amazing tutorials. Here are the results. Pretty amazing and I finished BOTH in one day.
I know they both are kind of fall-esque...but I love them and they were SO easy! The burlap wreath was super easy it only took like a half hour. The pumpkin one was more time consuming. I think it took me about 1-2 hours.
The week before school started this year I decided I needed a cute wreath for August-September and a Halloween wreath. So I looked at my pins and found two amazing tutorials. Here are the results. Pretty amazing and I finished BOTH in one day.
I know they both are kind of fall-esque...but I love them and they were SO easy! The burlap wreath was super easy it only took like a half hour. The pumpkin one was more time consuming. I think it took me about 1-2 hours.
Tuesday, December 14, 2010
Just In Time For Christmas!
I am off track in December this year (yay!) so I have had lots of time to craft and to shop. I am alomost done with all of my holiday shopping which is a first. I usually have to teach until Decmeber 23rd so I end up being one of those last minute shoppers out on Christmas Eve. This week I have been slowly wrapping all of my gifts and I remembered one of my friend's special gift wrapping tricks. My friend Katie over at favorites and things makes bows for her presents out of wrapping paper...genious!!
For the tutorial on how to make these fabulous bows go here. Who doesn't have a little extra scrap of paper while they're wrapping...I know that I always do! This is a great way to spruce up your gift for FREE! Speaking of free I also got onto google pictures and typed in "printable christmas gift tags" and found this little jewel. I hat buying gift tags because no one really looks at them and then just end up right in the garbage.
I found this adorable picture and went into word to make it all fit on one page. After I printed them out I colored them for an extra touch...They would look cute even without coloring but hey I had time;) This is the finished product!
Aren't my gifts beautiful with Katie's bows and the free gift tags? I love the double sided wrapping paper that I found this year at Sam's...the bows look great with the other side of the paper!
For the tutorial on how to make these fabulous bows go here. Who doesn't have a little extra scrap of paper while they're wrapping...I know that I always do! This is a great way to spruce up your gift for FREE! Speaking of free I also got onto google pictures and typed in "printable christmas gift tags" and found this little jewel. I hat buying gift tags because no one really looks at them and then just end up right in the garbage.
I found this adorable picture and went into word to make it all fit on one page. After I printed them out I colored them for an extra touch...They would look cute even without coloring but hey I had time;) This is the finished product!
Aren't my gifts beautiful with Katie's bows and the free gift tags? I love the double sided wrapping paper that I found this year at Sam's...the bows look great with the other side of the paper!
Tuesday, July 6, 2010
Jewelry Frame
For years I have been packing all of my jewelry into boxes and placing them in a drawer or on a shelf. I was sick and tired of digging through all my jewelry to find what I wanted. So I asked my wonderful husband to make me a jewelry frame. I drew him a picture, went to Home Depot with him to get the supplies and he made it for me. It turned out wonderful!! If you would like to see my another adorable jewelry holder follow this link. This is where I got inspired to have my husband make me one of my own.
Measurements: 2 feet tall and 3 feet long
(I could have gotten away with a 2x2 frame but I still love it.
Materials you will need:
10 feet of 4x1
6 feet of 2x1
1 roll of square chicken wire
3/4" hooks
hooks to hang it with
Acrilic Paint
Sandpaper
Dark Old English Polish
Tools:
Chop Saw (to cut the wood)
Staple gun (to staple the chicken wire to the frame)
Hammar
Drill
Painting:
I painted the entire frame black. Then to give it an antique look I took sandpaper and sanded the edges and corners until the wood was visible. Then I sanded the center part of the wood to give it some scratched texture (in some parts you could see through to the wood). Then I took the dark Old English and an old rag and wiped it all over the frame.
Sunday, March 28, 2010
New Craft Project
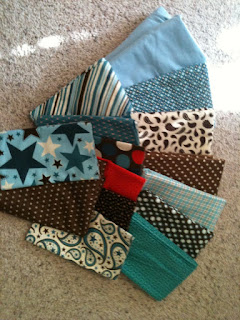
So my sister-in-law is making my niece a blanket to go on her bed in her bedroom. She is going to make the same rag quilt that I showed you a couple of months back. She asked me if I would go to the fabric store to help her pick out fabric. Of course I said YES! So this weekend I went and my other niece from Denver who is becoming an avid sewer came as well. I ended up buying some material for a fag quilt that I will be making for a little boy and my niece Sydney decided to make a rag quilt as well. I am so excited for this quilt I am going to be making.
My husband says that the material isn't very "boyish" but I will show him when it is done.
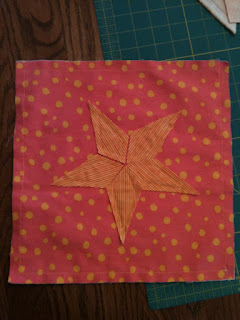
Sydney chose the cutest fabric for her quilt! She is going to be quite the little crafter one day. She doesn't like flowers very much so we changed it to stars. Look at what a wonderful job she did choosing her fabric and sewing this square!
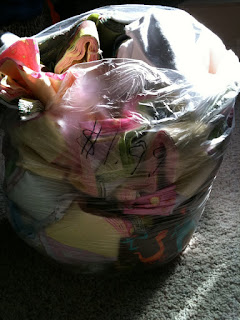
A frugal tip for all of you sewers out there. Most fabric stores have bags of fabric that is too small to be put on their remnant table. I bought this entire back of fabric for $1.99!
Makin Cascarones
This year my family had our Easter erly because my mom will be visiting my dad for Easter and my brother Merlin was in town with his kids. I have been saving my eggs shells since my last post and I was able to get a few dozen saved up for the event. I decided to make my own die for the eggs because I didn't want to spend money on this project!
Step 1: What you will need.
Cups for the die
Food coloring
Vinegar
Water
Spoons
1 Tbl.
Step 1: What you will need.
Cups for the die
Food coloring
Vinegar
Water
Spoons
1 Tbl.
Put 2 Tablespoons of vinegar in the bottom of your glass. Put 1t.-1T. of food coloring in the vinegar and stur. Then add enough water to completely cover the egg.
I tried to do purple but it turned out really ugly :(
These are the finished eggs
Step 2:Finishing
Once all of the eggs are died you will need all of the following:
Glue
Dyed eggs
Confetti (go to Kinko's or Alphagraphic's and have them empty their hole punchers)
Tissue paper (My mom saves all of the tissue paper given to her in gifts)
Cut the tissue paper into squares big enough to cover the opening in the top of the eggs
Fill your egg with confetti (this is paper from the shredder which doesn't work as well)
Put glue around the opening
Place tissue paper over the opening
Ta Da! You are done...Now you and your kids can have a blast smashing them on eachothers heads. Even my little 3 year old nieces joined in!
Monday, February 1, 2010
Warning!
So I hate cutting and measuring fabric and I hate hot glue (which I forgot). I wrote a while back that I was going to make this way cute craft...Well and did and it turned out better than I could have imagined. The only problem is, is that I cannot feel my fingers anymore because I have burned by hot glue so many times. Here is the Valentines Wreath I made tonight.
Didn't it turn out so cute?
There are a coupld of things that I had a hard time understanding in the instructions. Well I guess I understood fine I just needed to figure out how to do it right. I finished one side before I finally got what I should be doing. When you are rolling your roses keep your fingers a little distance apart.
You can change how far apart you have your fingers to change the look of the rose. When you finish rolling and gluing the end take the end of the piece in the center and the twist it to make the swirl spread apart.
And turn it upside down and glue in the center (where the swirl is) and also around the outside.
Then you are going to place it on the styrofoam heart. Hold your fingers at the base and then stick one of your fingers in the middle to push the whole rose down. Keep your fingers like this until the glue cools down. (This is where I burnt my fingers)
Here are a coupld of close-ups of two roses. One used a longer piece of fabric than the other.
Once you are done with this step this is what your fingers are going to look like.
I spent as much time peeling glue off my fingers as I did actually doing the wreath. One thing that I thought of near the end was that I should have taken all of the pieces and one long side of the strip of fabric do a running stitch on my sewing machine and then gather it, spin it, and sew it into a rose. Then glue it on. It would have taken a little bit longer but I wouldn't have had burnt fingers, or had to peel glue off my fingers every minute. If you decide to make this wreath and gather the fabric let me know how it works out.
Here are a coupld more pictures of the finished product.
Thursday, January 21, 2010
Tuesday, January 19, 2010
I Heart Headbands!
So I have been obssessed with looking at crafting blogs lately. I guess you can say I have the crafting bug. This is the latest craft that I just finished.
I just got my hair cut so I needed something super cute to add to my list of things to do with my hair. Here is another headband that I made. I figured brown and black can go with just about anything.
If you want to make these super cute headbands there is an online tutorial that is very easy to follow. If you have a hard time following written directions, like me, than there are fabulous pictures to help you along. Thank you UCreate!
My next post will be a Valentines Wreath. If you would like to do this craft along with me you can visit Smashed Peas and Carrots and join in the fun!
If you want to make these super cute headbands there is an online tutorial that is very easy to follow. If you have a hard time following written directions, like me, than there are fabulous pictures to help you along. Thank you UCreate!
My next post will be a Valentines Wreath. If you would like to do this craft along with me you can visit Smashed Peas and Carrots and join in the fun!
Thursday, January 14, 2010
Baby Quilt
Yesterday I finished a quilt that I started working on just after Christmas. This is a baby quilt, no I am not pregnant, I saw this pattern at The Fabric Center and fell in love with it. The pattern is by Sweet and Shabby Designs. It was super easy and as you can see very cute. If you would like to see or purchase patterns by Sweet and Shabby Designs you can visit their blog.
Subscribe to:
Posts (Atom)